Spec-Zone .ru
спецификации, руководства, описания, API
|
|
Spec-Zone .ru
спецификации, руководства, описания, API
|
After installation of the GUI version, the installer will have add its own Start Menu item under MySQL.
Files that are generated by MySQL Installer grant full permissions to the user that executes MySQL
Installer, including my.ini. This does not apply to files and directories for
specific products such as the MySQL Server data directory in ProgramData, that
is owned by SYSTEM.
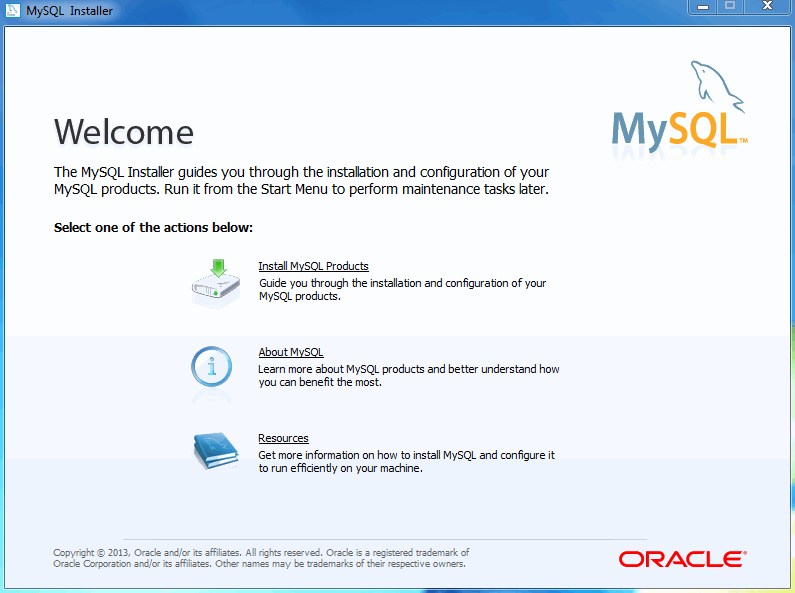
After the installer itself has been installed and started, the following screen is displayed:
There are three main options:
Install MySQL Products - The Installation Wizard.
About MySQL - Learn about MySQL products and features.
Resources - Information to help install and configure MySQL.
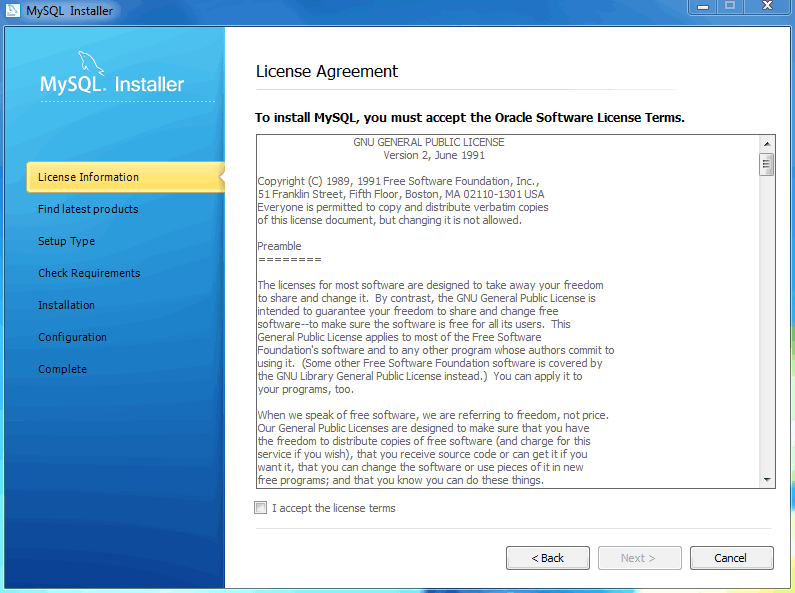
To Install MySQL Products after executing MySQL Installer for the first time, you must accept the license agreement before proceeding with the installation process.
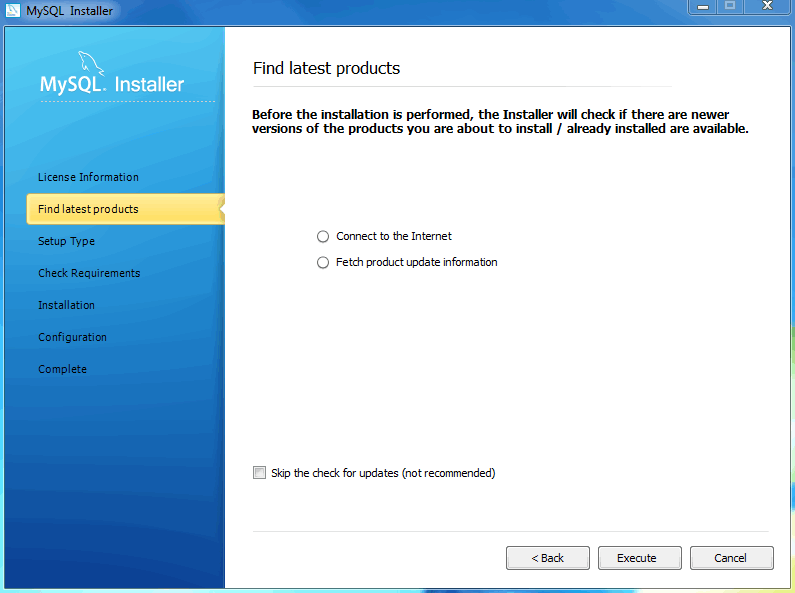
If you are connected to the Internet, then the Installer will search for the latest MySQL components and add
them to the installation bundle. Click to complete
this step, or otherwise check the Skip checkbox and then .
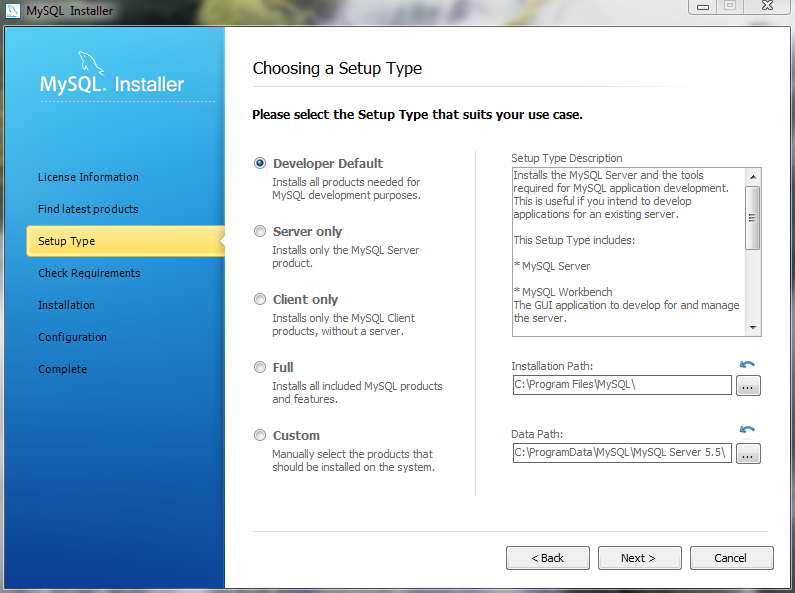
If you chose "Connect to the Internet," the next page will show the progress of MySQL Installer's search for available updates. When the search is complete (or if you opted to skip the search), you will be taken to the Choose Setup Type page:
Determine the option most compatible with your preferences by reading the Setup Type Description descriptions.
The Installation and Data paths are also defined here, and a caution flag will notify you if the data path you define already exists.
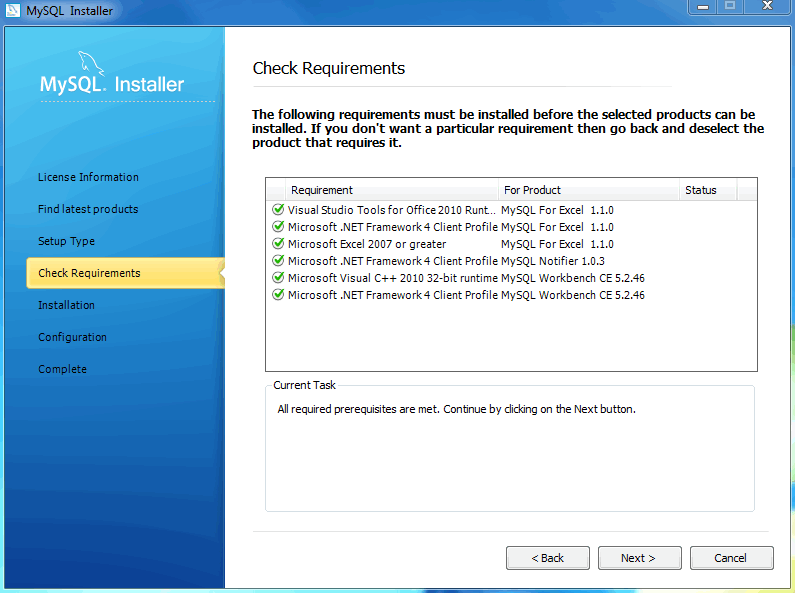
After you select a setup type, the MySQL Installer will check your system for the necessary external requirements and download then install missing components onto your system.
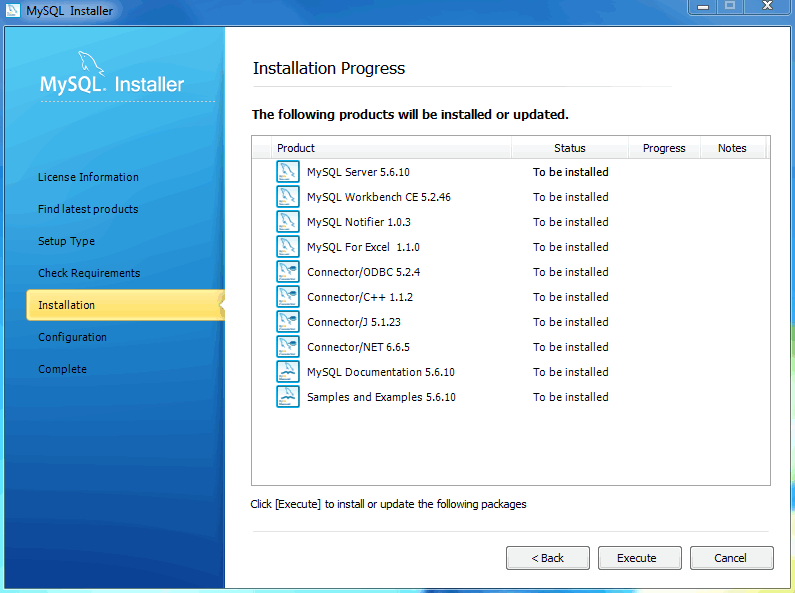
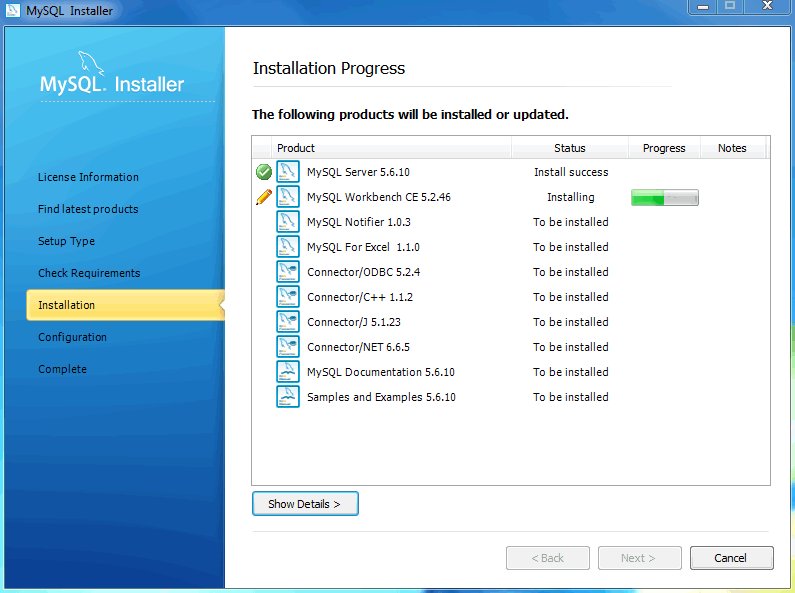
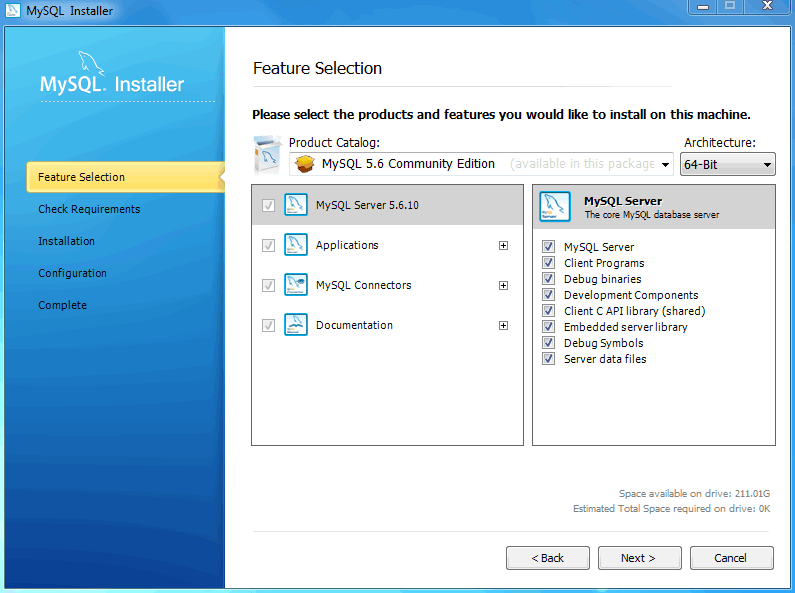
The next window lists the MySQL products that are scheduled to be installed:
As components are installed, you'll see their status change from "to be installed" to "install success."
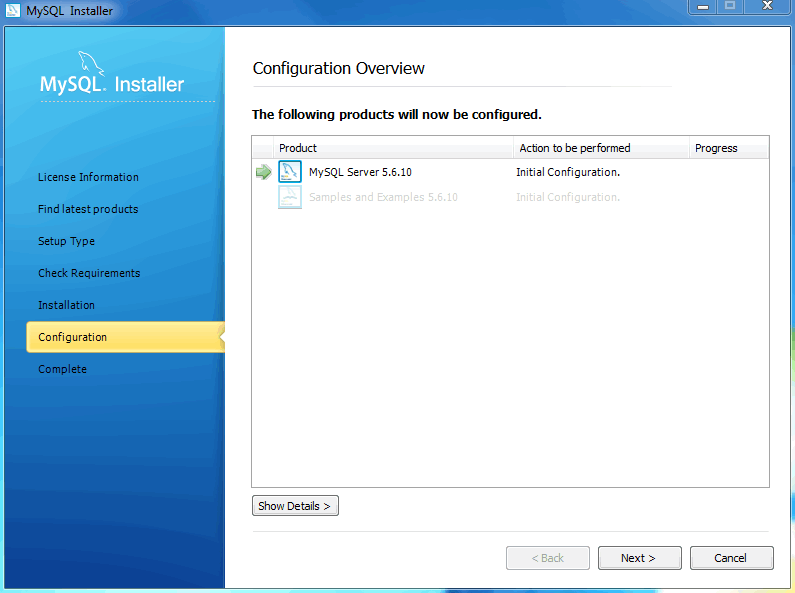
After all components are installed, the next step involves configuring the products. The Configuration
Overview window displays the progress and then loads a configuration window if it is required.
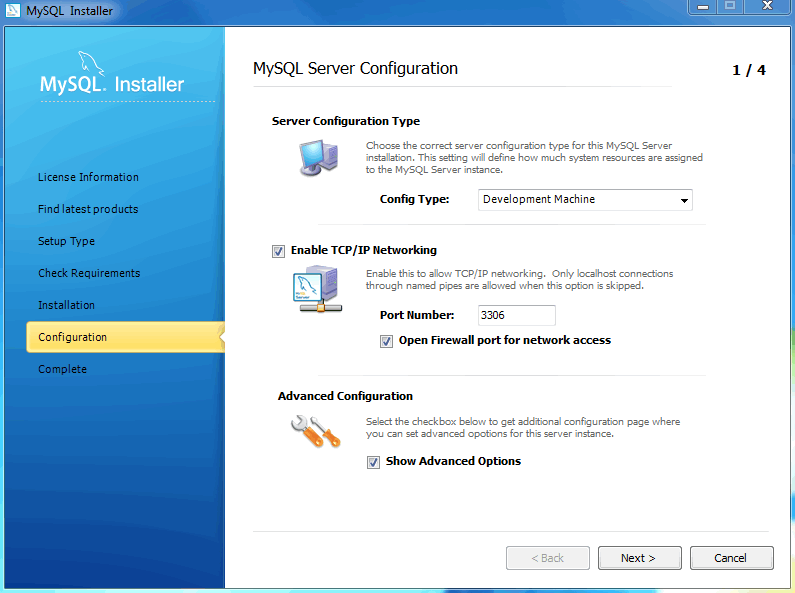
The ideal MySQL Server configuration depends on your intended use, as explained in the next window. Choose the description that most closely applies to your machine.
You may enable TCP/IP Networking here as otherwise only localhost connections are allowed.
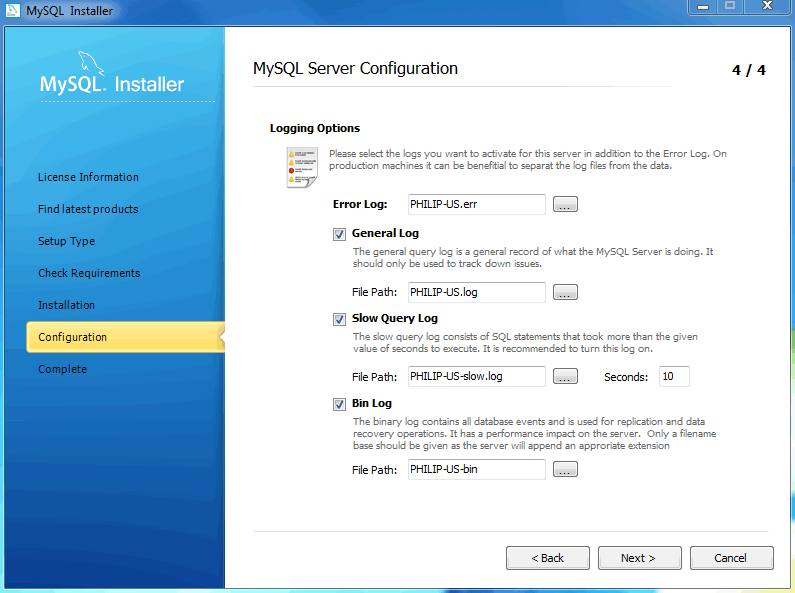
Checking the "Advanced Configuration" option provides additional Logging Options to configure. This includes defining file paths for the error log, general log, slow query log (including the configuration of seconds it requires to execute a query), and the binary log.
Figure 2.15. MySQL Installer - MySQL Server Configuration: Define platform, networking, andlogging options
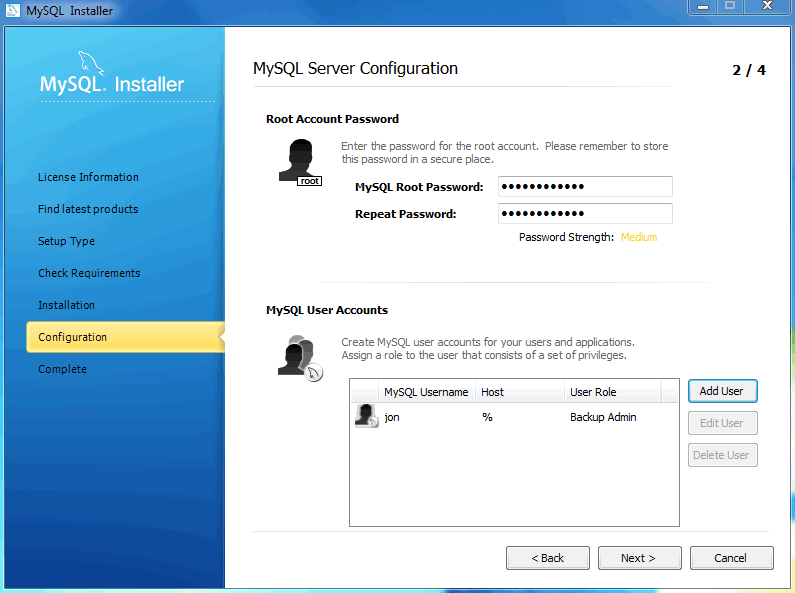
Next, choose your account information. Defining a root password is required, whereas it's optional to create additional users. There are several different predefined user roles that each have different permission levels. For example, a "DB Admin" will have more privileges than a "DB Designer.".
If the MySQL Server is already installed, then the Current Root
Password will also be needed.
Next, configure the Windows Service Details. This includes the service name, how the MySQL Server should be loaded at startup, and how the Windows Service for MySQL Server will be run.
When configuring Run Windows Services as ... using a Custom User, the custom user must have privileges to log on to Windows as a service. And the button will be disabled until this user is given these user rights.
On Microsoft Windows 7, this is configured by loading the Start Menu,
Control Panel, Administrative Tools, Local Security Policy, Local Policies, User Rights Assignment, then Log On As A Service.
Choose Add User or Group here to add the custom user, and then , to save.
The final configuration step is available if the Advanced Configuration option was checked, and it includes configuration options related to log file names:
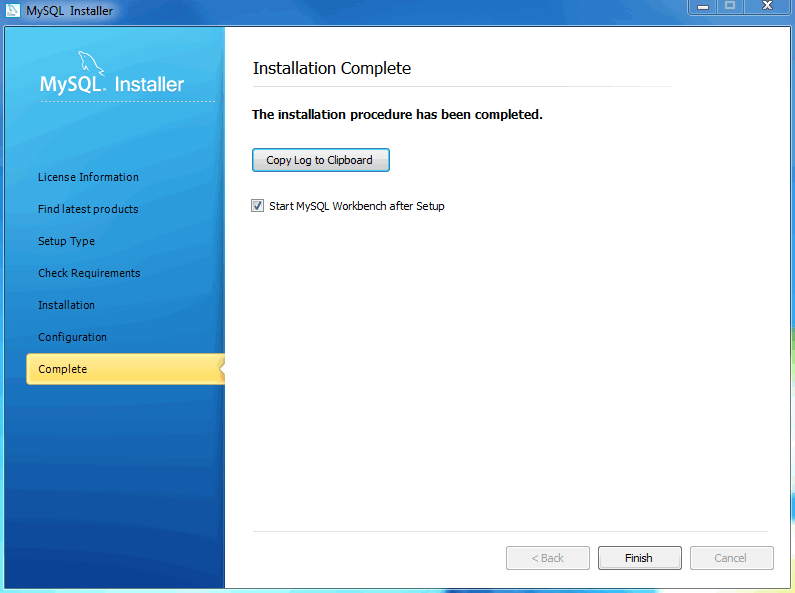
After the MySQL Installer configuration process is completed, you may save the installation log, and then load MySQL Workbench if the Start MySQL Workbench after Setup option is checked:
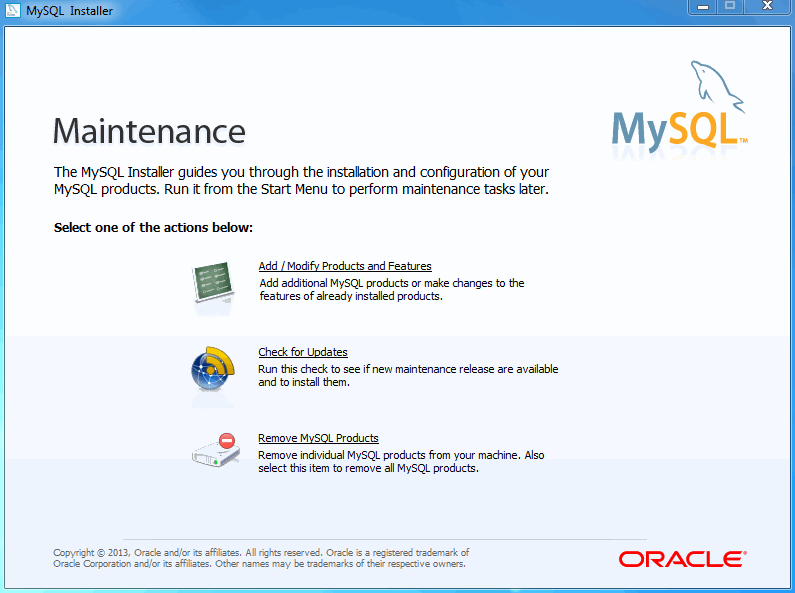
You can now open MySQL Installer from the Microsoft Windows Start menu under the MySQL group, which will load the MySQL Installer Maintenance
Screen. This is used to add, update, and remove features.
An Update Screen screen is shown if MySQL Installer is used on a
machine with older products installed, as opposed to the Maintenance Screen
shown above. However, the functionality remains the same.
Add/Modify Products and Features will list all installed and available MySQL products.
The installation is now complete. MySQL Server should be running, and most MySQL products installed and available for use.
See also the MySQL Workbench documentation ().