Spec-Zone .ru
спецификации, руководства, описания, API
|
|
Spec-Zone .ru
спецификации, руководства, описания, API
|
MySQL Connector/C++ is available as a static or dynamic library to use with your application. This section describes how to link the library to your application.
To avoid potential crashes, the build configuration of MySQL Connector/C++ should match the build configuration of the application using it. For example, do not use the release build of MySQL Connector/C++ with a debug build of the client application.
Static Library
The MySQL Connector/C++ static library file is mysqlcppconn-static.lib. You link
this library statically with your application. Also link against the files libmysql.dll and libmysql.lib. At runtime, the
application will require access to libmysql.dll.
Dynamic Library
The MySQL Connector/C++ dynamic library file is mysqlcppconn.dll. To build your
client application, link it with the file mysqlcppconn.lib. At runtime, the
application will require access to the files mysqlcppconn.dll and libmysql.dll.
Building a MySQL Connector/C++ Application with Microsoft Visual Studio
The initial steps for building an application to use either the static or dynamic library are the same. Some additional steps vary, depend on whether you are building your application to use the static or dynamic library.
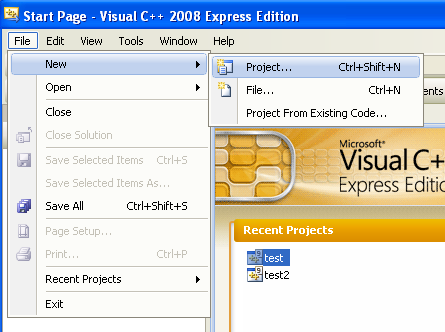
Select , , from the main menu.
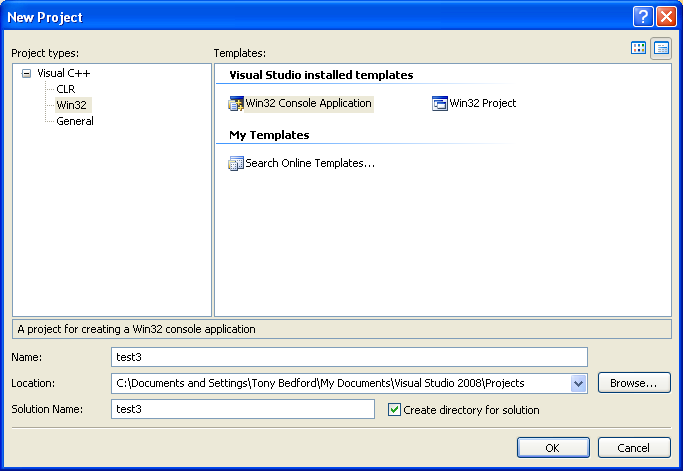
In the wizard, select Visual C++, Win32. From Visual Studio Installed Templates, select the application type Win32 Console Application. Enter a name for the application, then click , to move to the Win32 Application Wizard.
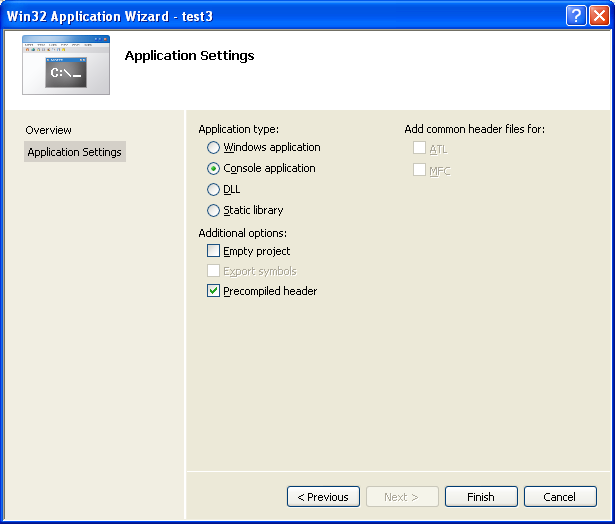
In the Win32 Application Wizard, click Application Settings and ensure the defaults are selected. The radio button Console application and the check box Precompiled headers are selected. Click to close the wizard.
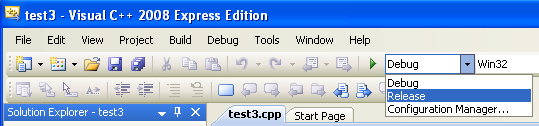
From the drop down list box on the toolbar, change from the default Debug build to the Release build.
From the main menu select , . This can also be accessed using the hot key + .
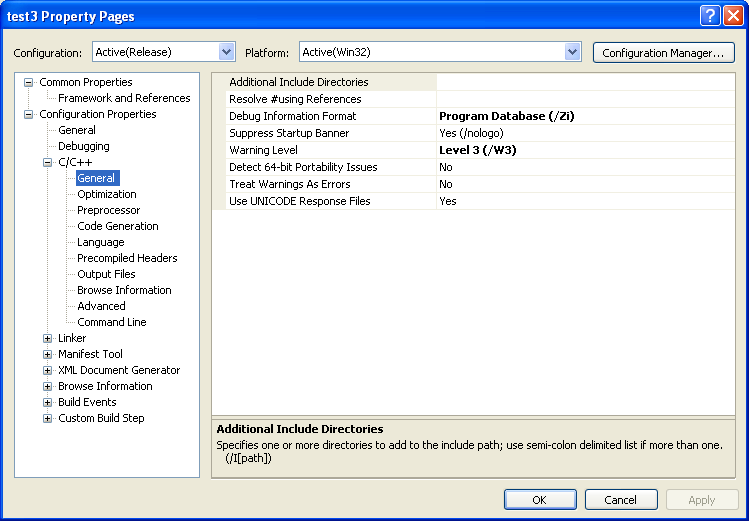
Under Configuration Properties, open the tree view.
Select , General in the tree view.
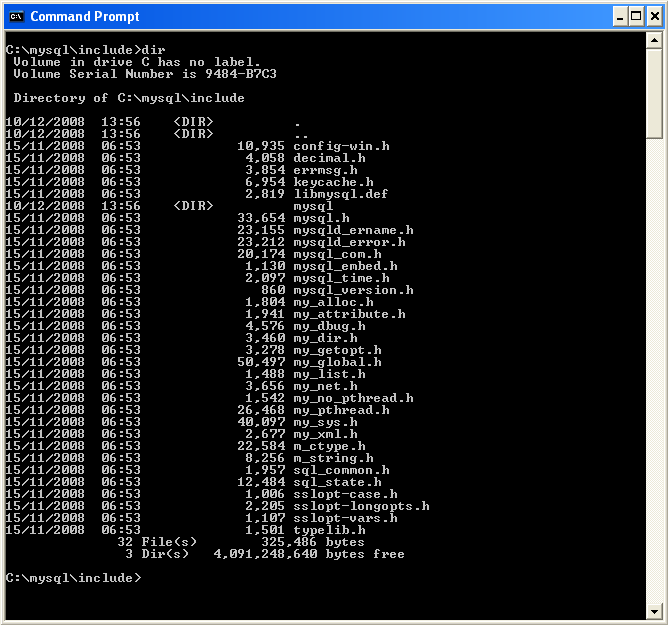
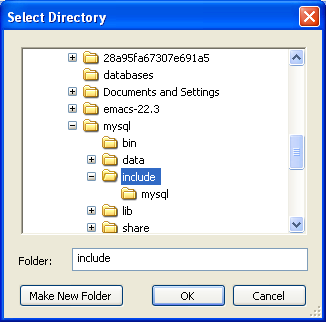
Ensure that Visual Studio can find the MySQL include directory. This directory includes header files that can optionally be installed when installing MySQL Server.
In the Additional Include Directories text field, add
the MySQL include/ directory.
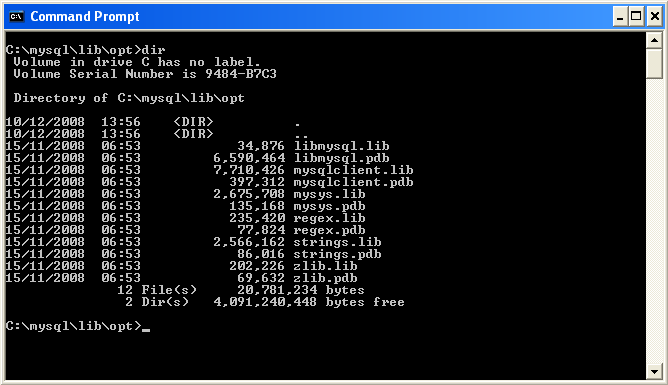
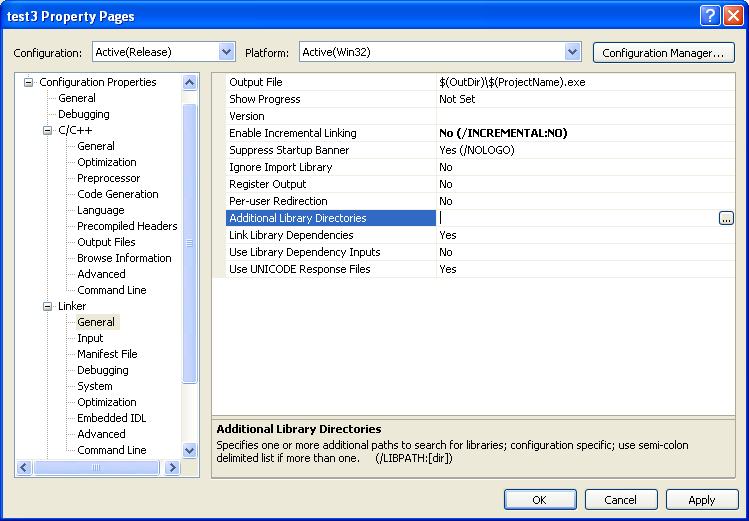
Also set the location of additional libraries that Visual Studio needs to build the
application. These are located in the MySQL lib/opt directory, a
subdirectory of the MySQL Server installation directory.
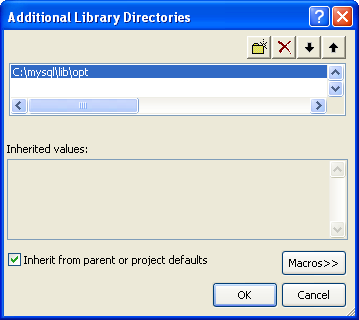
In the tree view, open Linker, General, Additional Library Directories.
Add the lib/opt directory into the Additional Library Directories text field. This enables the library file
libmysql.lib to be found.
The remaining steps depend on whether you are building an application to use the MySQL Connector/C++ static or dynamic library. If you are building your application to use the dynamic library, see Section 21.4.4, "Building MySQL Connector/C++ Windows Applications with Microsoft Visual Studio". If you are building your application to use the static library, carry out the following steps:
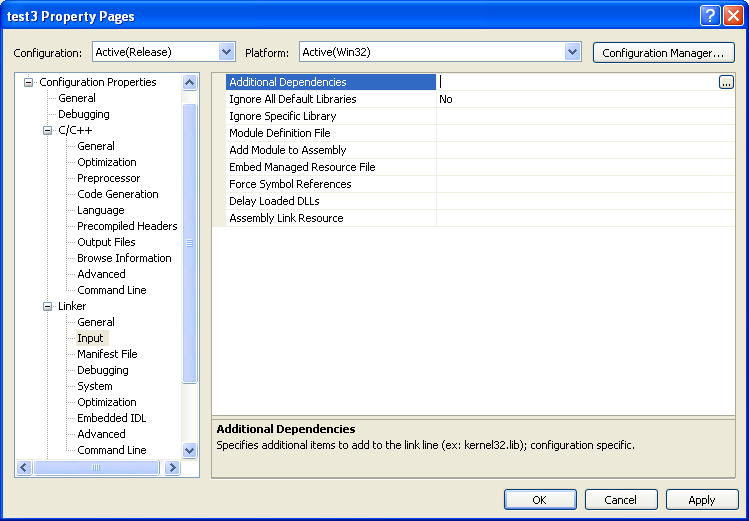
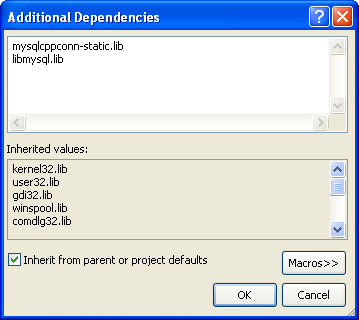
Open Linker, Input, Additional Dependencies.
Enter mysqlcppconn-static.lib and libmysql.lib.
By default CPPCONN_PUBLIC_FUNC is defined to declare
functions to be compatible with an application that calls a DLL. If you are building an application to
call the static library, ensure that function prototypes are compatible with this. In this case, define
CPPCONN_PUBLIC_FUNC to be an empty string, so that functions are declared
with the correct prototype.
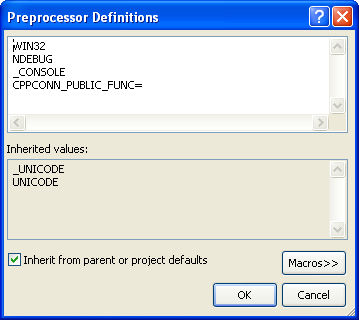
In the Project, Properties tree view,
under C++, Preprocessor, enter CPPCONN_PUBLIC_FUNC= into the
text field.
Make sure you enter CPPCONN_PUBLIC_FUNC= and not CPPCONN_PUBLIC_FUNC, so that it is defined as an empty string.
If you are building an application to use the MySQL Connector/C++ dynamically linked library, carry out these steps:
Under Linker, Input,
add mysqlcppconn.lib into the Additional Dependencies
text field.
mysqlcppconn.dll must be in the same directory as the
application executable, or somewhere on the system's path, so that the application can access the MySQL
Connector/C++ Dynamic Linked Library at runtime.
Copy mysqlcppconn.dll to the same directory as the application.
Alternatively, extend the PATH environment variable using SET PATH=%PATH%;C:\path\to\cpp. Alternatively, you can copy mysqlcppconn.dll to the Windows installation Directory, typically
c:\windows.